
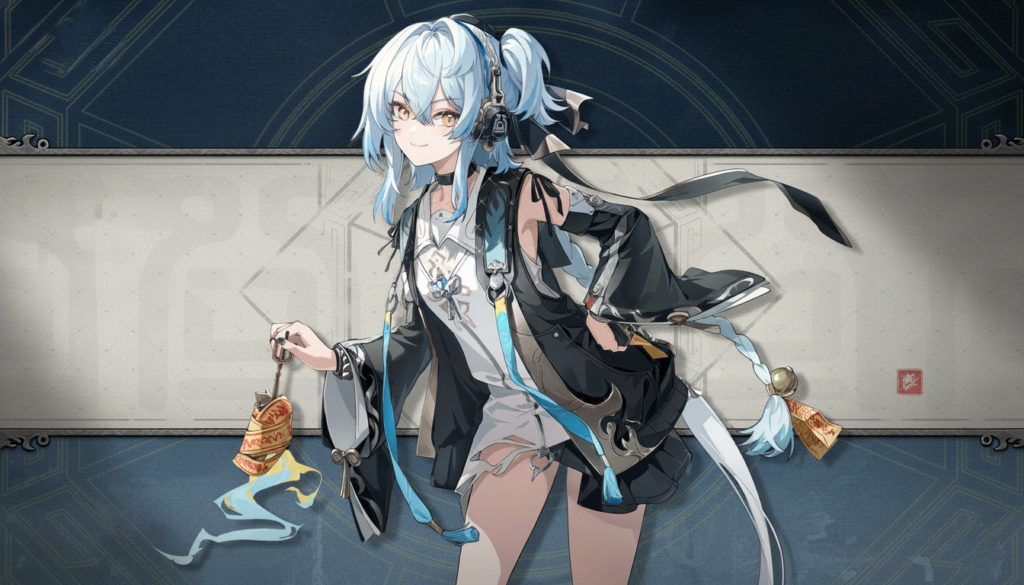

Character Level: 90
HP:
10625
ATK:
225
DEF:
1259
ENRG:
125
Buling Build Guide
RRTY:
4★
Character Overview
In Wuthering Waves, Buling is a 5-Stars Electro character and uses Rectifier during the fight.
Character Mechanism
Buling’s Basic Attack has four segments.
The second segment grants a yellow mark.
The fourth segment grants a blue mark.
After using the Resonance Skill, there is a continuous enemy-grouping effect, and a blue mark is gained.
The Resonance Skill can be directly followed by the fourth segment of the Basic Attack, allowing you to gain two blue marks consecutively.
When you have 2 or more marks and use a Heavy Attack, it will consume 2 marks.
If the consumed marks are different colors (e.g., yellow + blue or blue + yellow), you gain one segment of Minor Yang—the golden portion on the left side of the Forte Circuit bar.
If the consumed marks are the same color (e.g., two yellow or two blue), you gain one segment of Minor Yin—the portion on the right side of the Forte Circuit bar.
When Buling possesses both Minor Yin and Minor Yang, her Resonance Liberation is enhanced.
Electro Flare, when launched, creates a field lasting 24 seconds, which adds 2 stacks of Electro Flare every 2 seconds.
During this time, there is an effect similar to Shorekeeper’s enhanced Intro Skill buff. Starting from when Buling uses her ultimate:
After one Intro Skill use, the active character gains 10% Resonance Skill DMG Bonus.
After two Intro Skill uses, the active character gains 25% Resonance Skill DMG Bonus.
Buling’s own Intro Skill directly adds 4 stacks of Electro Flare.
Her Outro Skill follows the standard healer template: provides sustained HP recovery and a 15% universal DMG Deepen buff lasting 30 seconds.
Buling’s various Heavy Attacks have slight differences:
Yellow + Blue: Deals higher damage.
Blue + Yellow: Reduces more Vibration Strength.
Yellow + Yellow: Provides a one-time heal.
Blue + Blue: Provides sustained healing (once per second, 8 times total).
The two most beneficial Heavy Attacks are Yellow + Blue and Blue + Blue.
Now, let’s discuss Electro Flare.
First, its damage pattern is that it deals damage once every 6 seconds, and the stacks on the enemy are immediately halved afterward.
The maximum stack count is 10. However, if stacks continue to be added beyond the maximum, they become a temporary effect called Electro Rage, which appears to the left of the original Electro Flare indicator.
Excess stacks beyond 10 become Electro Rage. Its effect is to increase the damage of the next Electro Flare damage-over-time tick, after which it disappears.
Character Skill Priority


Character Kit Description
Buling Basic Attack:
| Stage 1 DMG | 20.73%*2 |
|---|---|
| Stage 2 DMG | 33.45%*2 |
| Stage 3 DMG | 23.51%*2 |
| Stage 4 DMG | 93.64% |
| Mid-air Attack DMG | 73.96% |
| Dodge Counter DMG | 23.51%*2 |
| Heavy Attack – Mountain Over Thunder DMG | 178.93% |
| Heavy Attack – Thunder Over Mountain DMG | 89.47% |
| Heavy Attack – Twin Mountains Healing | 716+135.20% ATK |
| Heavy Attack – Twin Thunders Healing | 169+18.30% ATK |
| Mid-air Attack STA Cost | 30 |
| Heavy Attack – Mountain Over Thunder STA Cost | 20 |
| Heavy Attack – Thunder Over Mountain STA Cost | 20 |
| Heavy Attack – Twin Mountains STA Cost | 20 |
| Heavy Attack – Twin Thunders STA Cost | 20 |
| Heavy Attack – Ghost Gate Omen STA Cost | 20 |
| Heavy Attack – Mountain Over Thunder Concerto Regen | 15 |
| Heavy Attack – Thunder Over Mountain Concerto Regen | 15 |
| Heavy Attack – Twin Mountains Concerto Regen | 15 |
| Heavy Attack – Twin Thunders Concerto Regen | 15 |
Basic Attack
Perform up to 4 consecutive attacks, dealing Electro DMG.
Heavy Attack – Mountain Over Thunder
Hold Normal Attack to consume the highlighted Trigram – Mountain and Trigram – Thunder from left to right and cast Heavy Attack – Mountain Over Thunder, dealing Electro DMG.
Heavy Attack – Thunder Over Mountain
Hold Normal Attack to consume the highlighted Trigram – Thunder and Trigram – Mountain from left to right and cast Heavy Attack – Thunder Over Mountain, dealing a small amount of Electro DMG and additionally reducing the target’s Vibration Strength.
Heavy Attack – Twin Mountains
Hold Normal Attack to consume the highlighted 2 Trigrams – Mountain from left to right and cast Heavy Attack – Twin Mountains, healing all nearby Resonators in the team.
Heavy Attack – Twin Thunders
Hold Normal Attack to consume the highlighted 2 Trigrams – Thunder from left to right and cast Heavy Attack – Twin Thunders, healing all nearby Resonators in the team once per second for 8s.
Heavy Attack – Ghost Gate Omen
When holding Normal Attack with fewer than 2 Trigrams, Buling fails the divination, becoming temporarily immobilized and losing all Trigrams and 20% of her current HP. This effect will not consume HP if Buling’s current HP is below 1%.
Mid-air Attack
Consume STA to perform Mid-air Attack, dealing Electro DMG.
Dodge Counter
Press Normal Attack right after a successful Dodge to perform Basic Attack Stage 3, dealing Electro DMG.
– After performing Dodge Counter, press Normal Attack to perform Basic Attack Stage 4.
Trigram
Buling can hold up to 4 Trigrams. When Trigrams reach the max number, gaining new Trigrams moves all Trigrams 1 slot to the left, and the original leftmost Trigram will be removed.
– Trigram – Mountain is obtained when Basic Attack Stage 2 deals damage.
– Trigram – Thunder is obtained when Basic Attack Stage 4 or Mid-air Attack deals damage.
– Trigram – Thunder is obtained when casting Resonance Skill – In Shadow Thunder Stirs.
Buling Resonance Skill:
| Thunder Talisman DMG | 58.40% |
|---|---|
| Pull-in Effect Continuous DMG | 5.84%*10 |
| Cooldown | 15s |
| Concerto Regen | 23 |
Attack the target, dealing Electro DMG and continuously pulling in nearby targets.
– Right after casting Resonance Skill, press Normal Attack to perform Basic Attack Stage 4.
Buling Resonance Liberation:
| Flashing Thunder Spell DMG | 357.86% |
|---|---|
| Cooldown | 24s |
| Resonance Energy Cost | 150 |
| Concerto Regen | 20 |
Attack the target, dealing Electro DMG.
Buling Forte Circuit:
| Flashing Thunder Spell – Harmony DMG | 536.79% |
|---|---|
| Five Thunders Spell Array Continuous DMG | 19.89% |
Yin-Yang Balance
When Buling obtains Minor Yin and Minor Yang, she enters the Yin-Yang Balance state, replacing her Resonance Liberation – Flashing Thunder Spell with Resonance Liberation – Flashing Thunder Spell: Harmony.
Flashing Thunder Spell – Harmony
Attack the target, dealing Electro DMG and generating a Five Thunders Spell Array at the target area. The array deals Electro DMG and inflicts 2 stacks of Electro Flare on all targets within it every 2s, lasting for 24s. When Five Thunders Spell Array is active, all Resonators in the team enter the Thunder Spell – Primordial Qi state.
– While in the Thunder Spell – Primordial Qi state, when any Resonator in the team casts Intro Skill, Thunder Spell – Primordial Qi becomes Thunder Spell – Yin and Yang.
– Thunder Spell – Yin and Yang grants 10% Resonance Skill DMG Bonus to all active Resonators in the team. When any Resonator in the team casts Intro Skill during this state, Thunder Spell – Yin and Yang becomes Thunder Spell – Heaven, Earth, Mind.
– Thunder Spell – Heaven, Earth, Mind grants 25% Resonance Skill DMG Bonus to all active Resonators in the team.
Minor Yang and Minor Yin
– Minor Yang is obtained after casting Heavy Attack – Mountain Over Thunder or Heavy Attack – Thunder Over Mountain.
– Minor Yin is obtained after casting Heavy Attack – Twin Mountains or Heavy Attack – Twin Thunders.
Buling Passive Skills:
- Time Arrives, Evil Declines: Buling gains 25% Healing Bonus when restoring HP for Resonators with less than 50% HP.
- Earthly Immortal is Here!: Targets damaged by Intro Skill – Summon and Smite obtain 4 stacks of Electro Flare. This effect is triggered once every 10s.
Buling Switch Skills:
- Summon and Smite (Intro Skill): Attack the target, dealing Electro DMG and healing all nearby Resonators in the team.
- Exorcism Spell (Outro Skill): Heal the active Resonator in the team by 18% of Buling’s ATK per second for 16s. All nearby Resonators in the team have their DMG Amplified by 15% for 30s.
Buling Stat Bonus:
- Crit Rate – 8%
- Atk% – 12%
Character Burst Rotation
- Intro Skill
- Basic Attack * 4 (Blue=1, Yellow=1)
- Resonance Skill
- Basic Attack * 1 (Blue=3, Yellow=1)
- Hold Basic Attack to use 2 Heavy Attacks (Get “Minor Yang” and “Minor Yin”)
- Echo Skill
- Resonance Liberation (Enhanced Resonance Liberation)
- Outro Skill
Character Resonance Chain
S1: The Crit. Rate of Resonance Liberation – Flashing Thunder Spell: Harmony is increased by 20% upon dealing damage.
S2: Buling restores 25 points of Resonance Energy when she enters the Yin-Yang Balance state. This effect is triggered once every 24s.
S3: While Five Thunders Spell Array lasts, whenever the HP of Resonators in the team drops below 50%, immediately restore their HP by 350+150% of Buling’s ATK. This effect can be triggered once every 24s.
S4: Buling gains 20% Healing Bonus.
S5: Five Thunders Spell Array instantly inflicts another 6 stacks of Electro Flare on all targets within its range upon generation.
S6: The Thunder Spell – Heaven, Earth, Mind state now grants 50% Resonance Skill DMG Bonus to the active Resonator in the team.
Character Build

Main Echo

Any Cost 3 Echo
Any Cost 3 Echo
Any Cost 1 Echo
Any Cost 1 Echo
For Echoes, Buling can simply wear a Healer set. Use Fallacy of No Return as the main Echo.
For main stats:
4-Cost Echo: Healing Bonus
3-Cost Echoe: Energy Regen
1-Cost Echo: ATK%
As for substats :
Crit Rate / Crit DMG > ATK% > Flat ATK.
For Echoes, Buling can simply wear a Healer set. Use Fallacy of No Return as the main Echo.
For main stats:
4-Cost Echo: Healing Bonus
3-Cost Echoe: Energy Regen
1-Cost Echo: ATK%
As for substats :
Crit Rate / Crit DMG > ATK% > Flat ATK.
Cost 4: Healing Bonus
Cost 3: Double 32% Energy Regen
Cost 1: 18% ATK
Sub Stats: Energy Regen(Before 230%) > CRIT Rate = CRIT DMG > ATK% > Flat ATK
Character Build

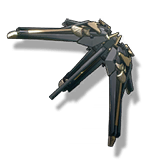
Main Weapon
Regarding weapons, while Buling does not lack Concerto Energy, she is deficient in Energy Recharge. Generally, having around 230% Energy Recharge provides a comfortable gameplay experience. Therefore, weapons with Energy Recharge are still recommended.
As for Shorekeeper’s signature weapon, Buling’s Resonance Skill does not provide healing, so she cannot trigger its effect.
Character Team Comp


Main DPS – Phrolova
Phrolova is a DPS which mainly deals RS damage. And Phrolova’s Hecate can use more Enchanced Attack as Qiuyuan can provide extra Echo Skill to her.
Sub DPS – Canterella/Qiuyuan
Cantarella is a DPS that can provide small amount of healing to teammates. Her Outro Skill grants the next character a 20% Havoc damage boost and a 25% resonance skill depeen buff.
Qiuyuan’s skill set provides multiple Echo Skills to grant more Enhanced Attack to Hecate.
Healer – Buling
Buling is a healer that can provide All-type damage deepen buff to allies. Additional she can provide RS damage bonus to allies.
Basically any team with a good Support Character/Sub-DPS, should be able to extract Buling’s full potential